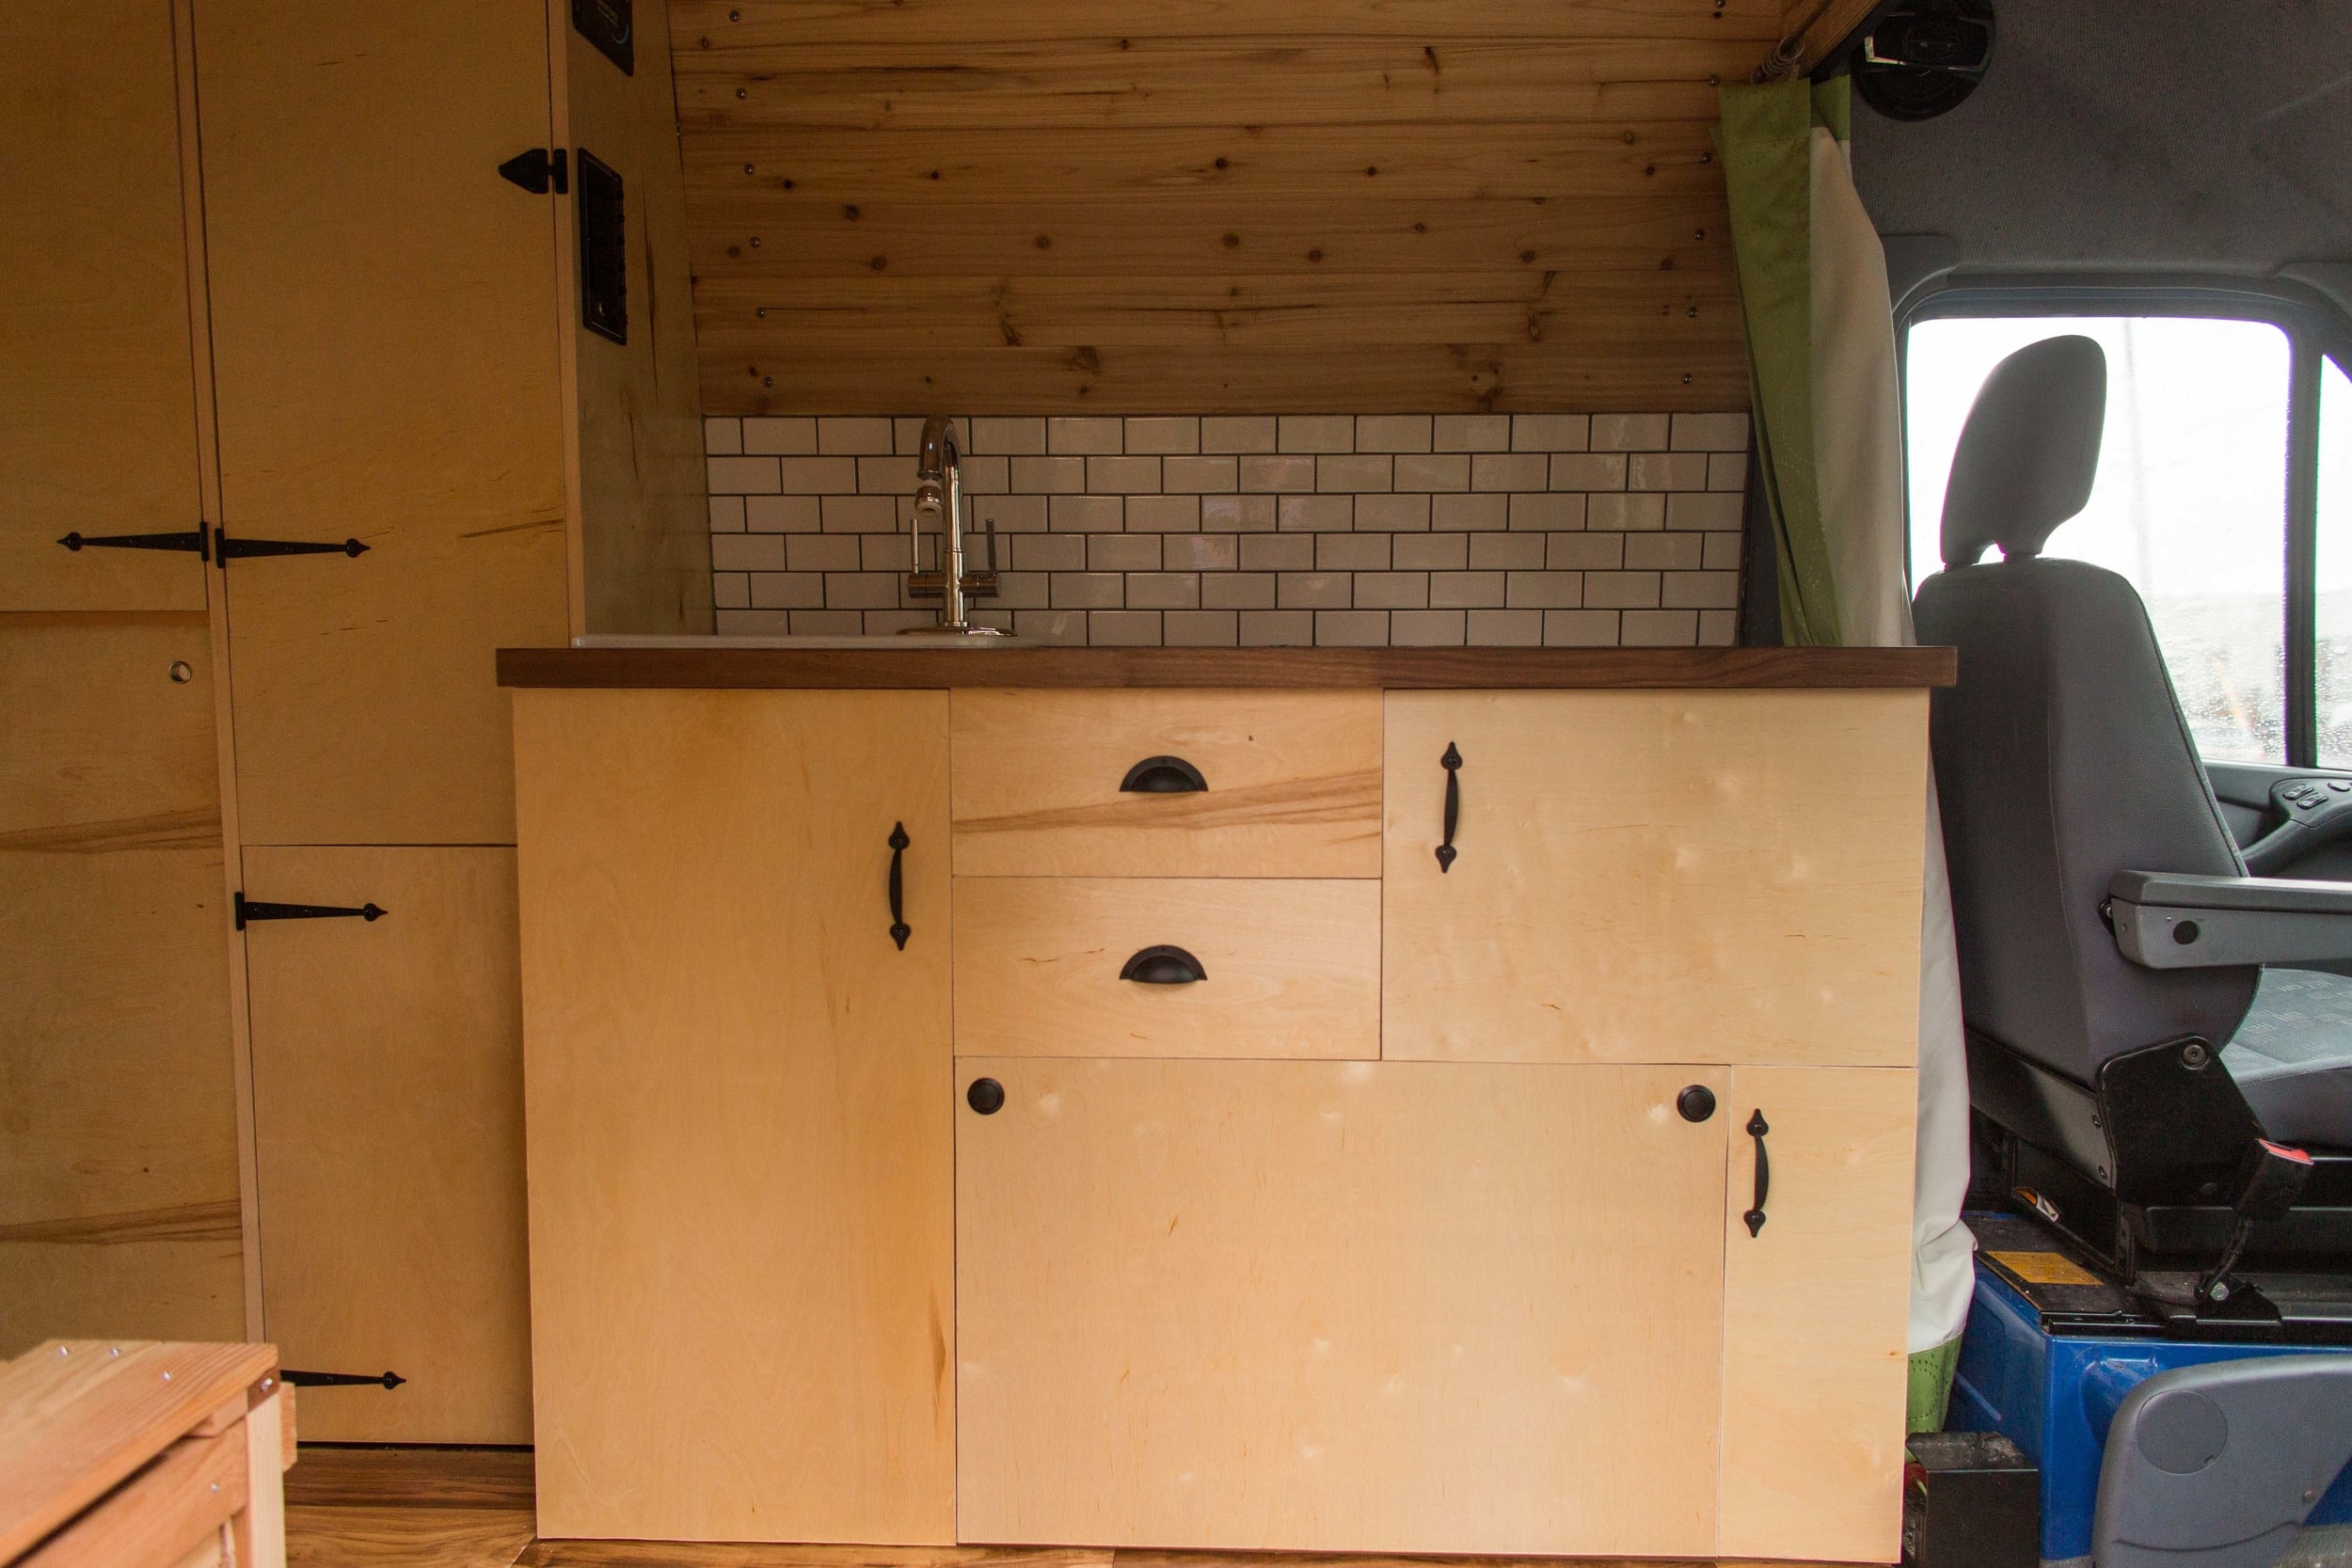
Building out the kitchen turned out to be easier than the storage shelves. The kitchen cabinets have shorter sides (less warping!) and are smaller in general. I felt like it was easier to ensure everything was perpendicular and square. Also, I chose to overlay the cabinets doors which I feel better hides imperfections.
In it's design, I needed to have a taller space to accommodate the sink basin and grey/fresh water jugs. I also needed a space big enough to fit the ARB Fridge, as well as space for food, dishes, cutlery, and other miscellaneous things. The original overall design allowed space for overhead cabinets. But given the standard space between countertop and hanging cabinets, and the shortness of the ceiling, I decided that overhead cabinets required far more work than the space that was provided.
View plans for the kitchen cabinets here on SketchUp!
Items Needed:
3/4" prefinished birch plywood for the sides and shelving; 1/2" prefinished for the doors (same as the storage shelves)
2x3 common board used as structural support
Pocket screws (1 1/4" and 1") and jig
Table saw for cutting
90 degree concealed overlay surface mount hinges; cabinet pulls
Drawer slides - 1 regular for pull-out drawer and 1 heavy-duty pantry slide for the fridge
Sink and Faucet - I got mine at the Rebuilding Center here in Portland
Countertop - a walnut veneer top from Ikea
Tile - Subway tile, and an appropriate adhesive, grout, and caulk
The normal depth of cabinets and countertops are around 24" with a 1" or so countertop overhang. Because of the smaller size, the pieces were easier to cut out and work with. I did most of the door cuts with a tablesaw and the larger side cuts with a circular saw and clamped straight edge. I used structural runners at the front-top, front bottom, and rear-top of the cabinets. This gave the cabinet boxes some stability, as well as an anchoring point to the van. Luckily, the van sides up to 3 feet are straight for the most part, so cutting out the curve as done in the storage shelf was not necessary. Everything screwed together easily with the pocket jig
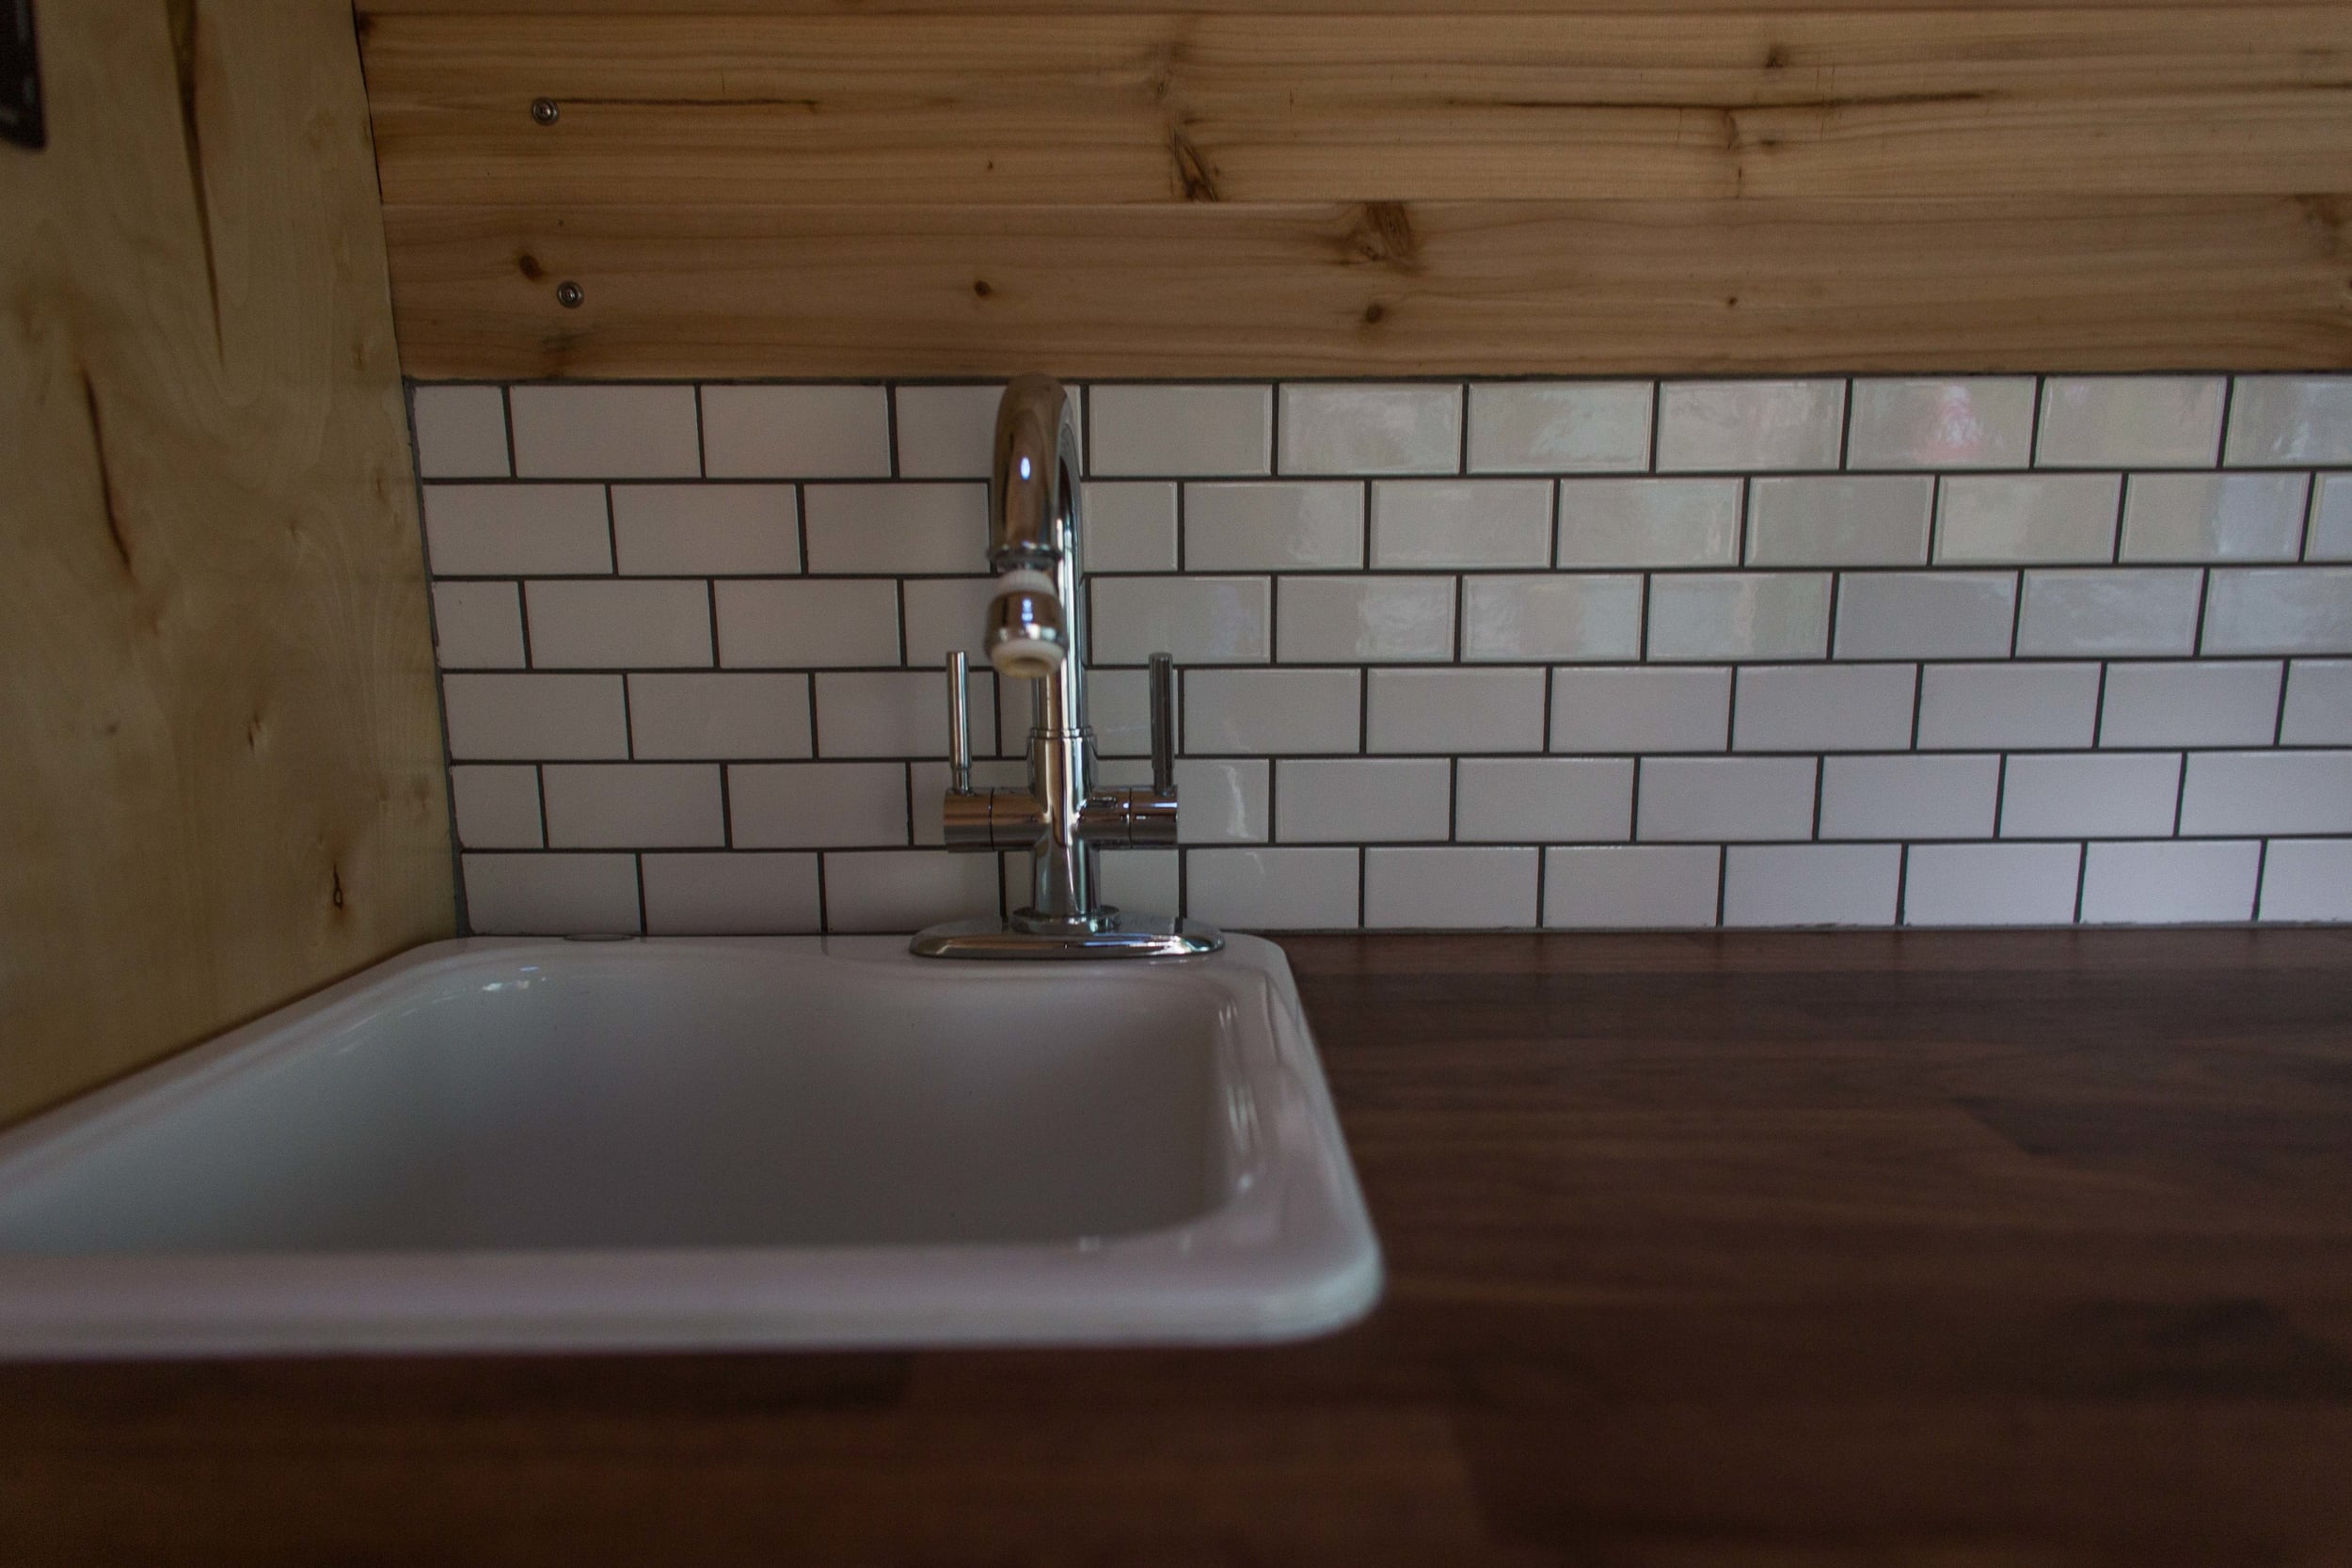
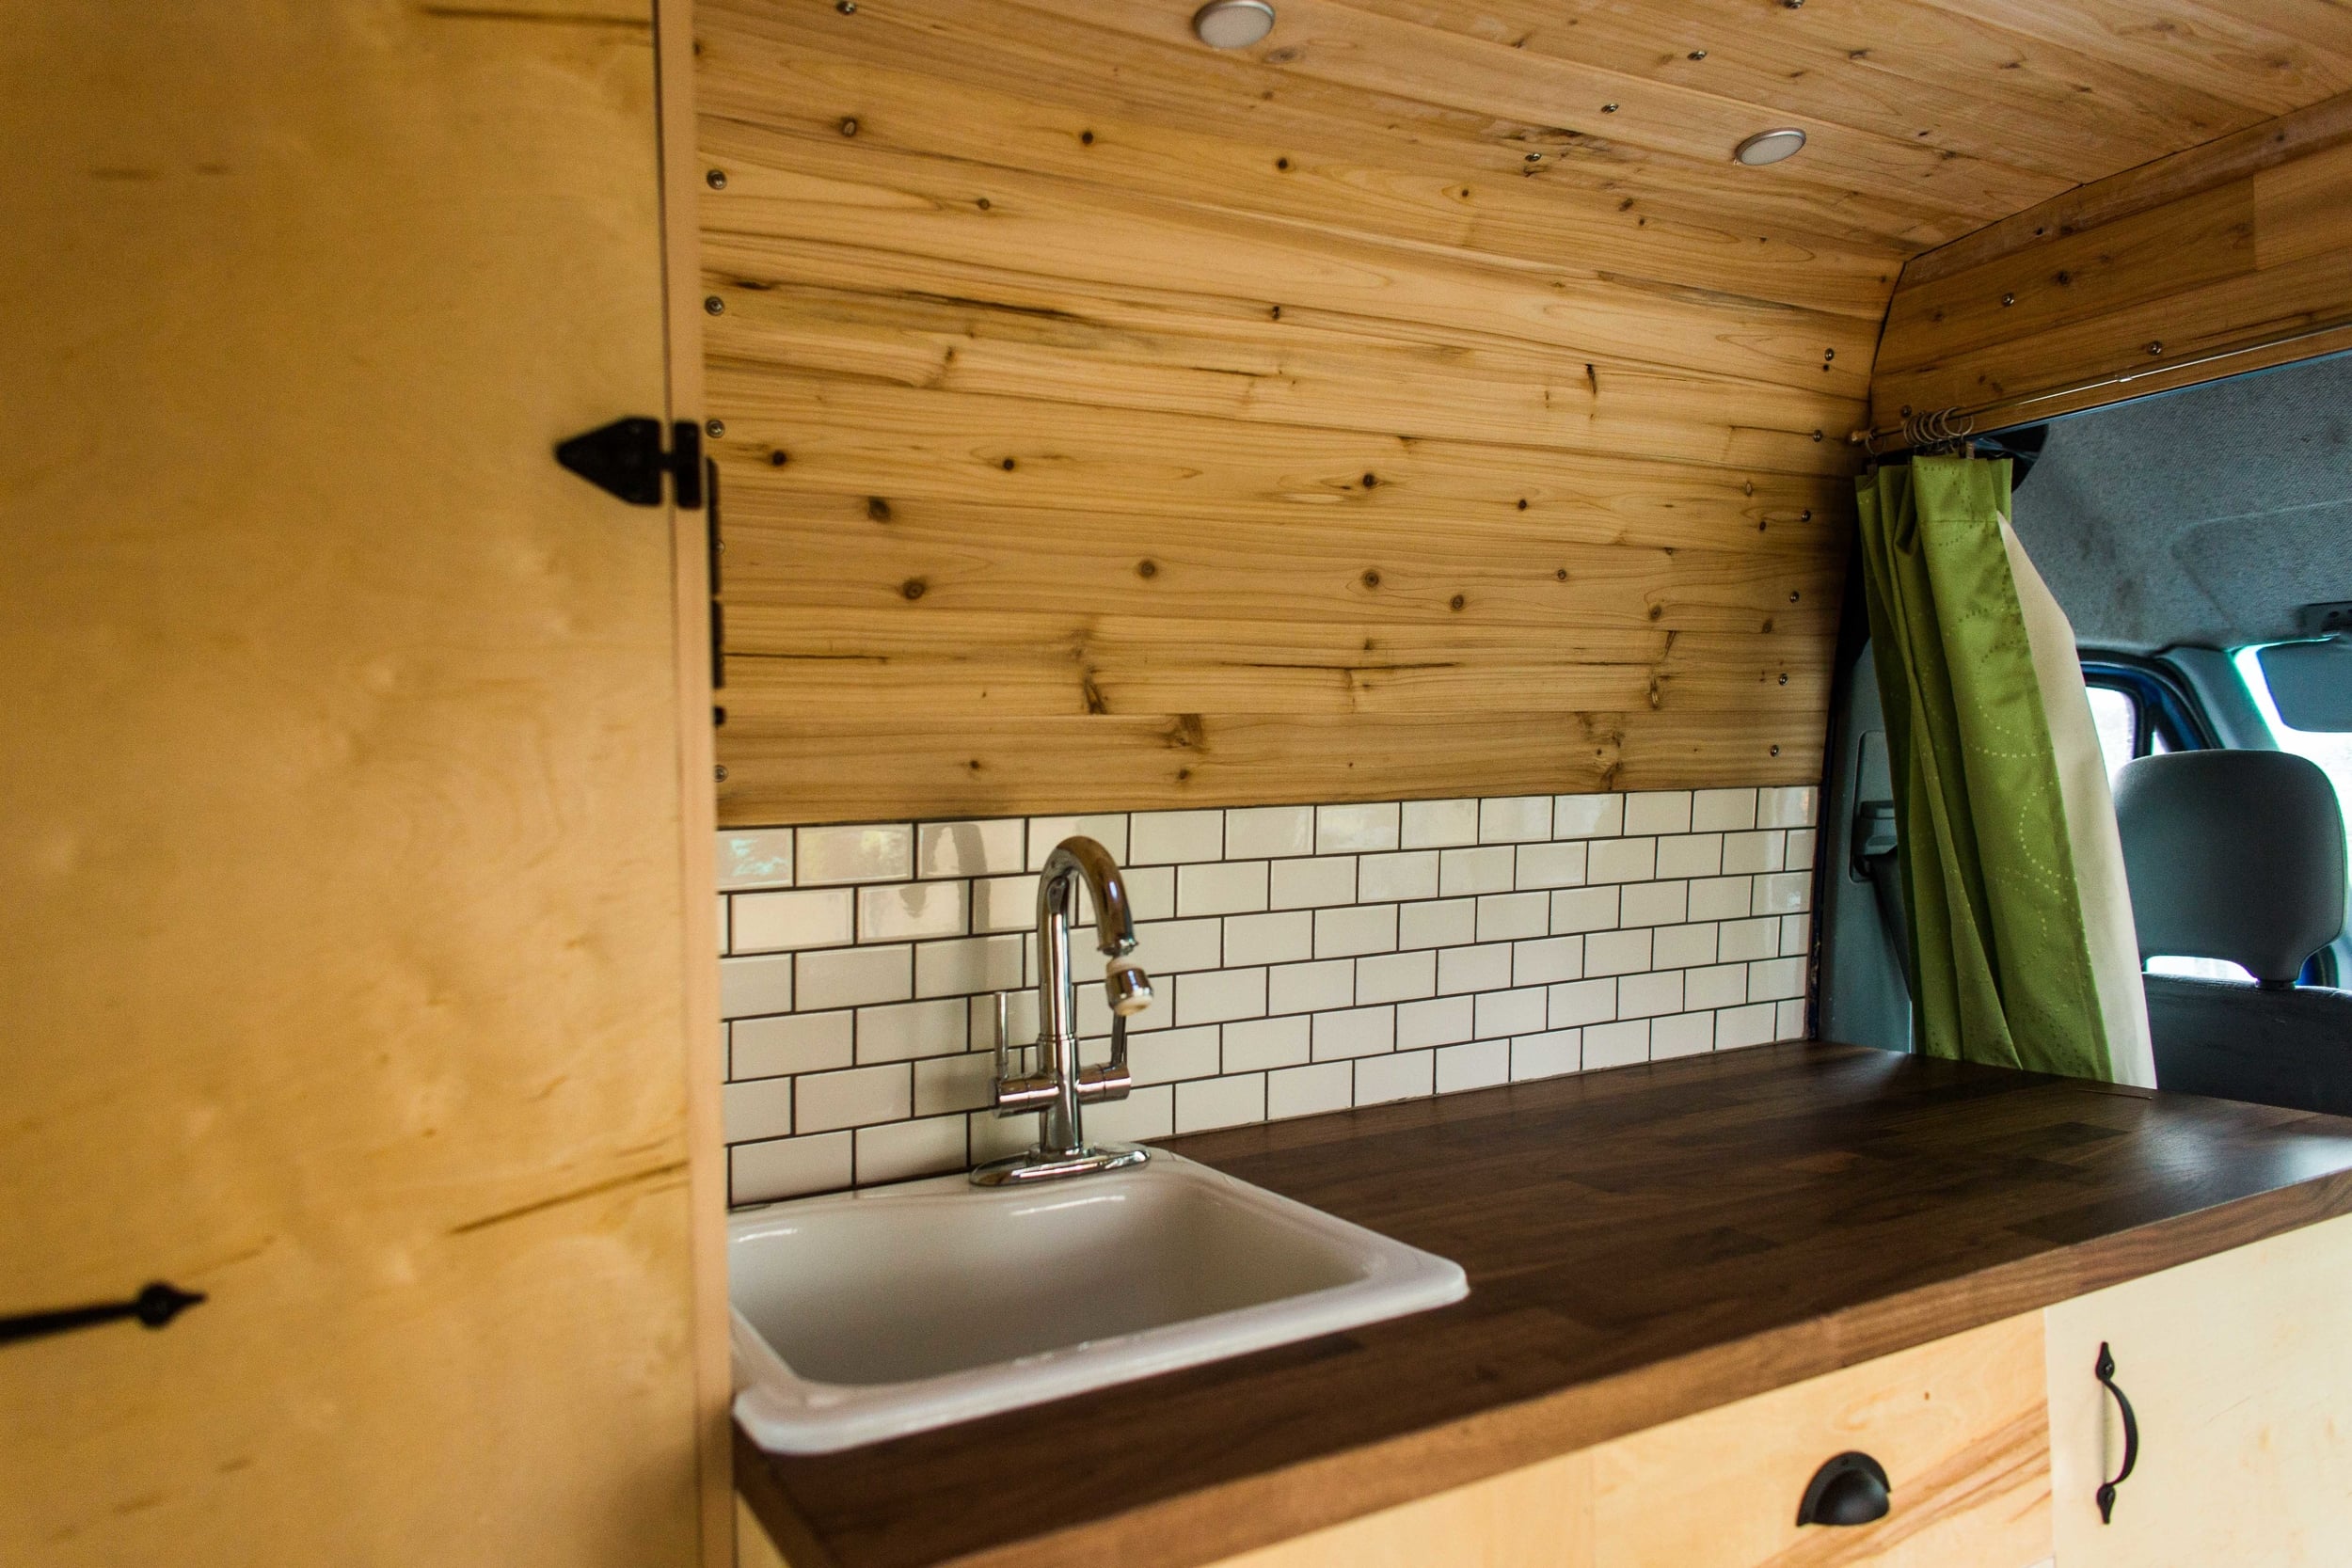
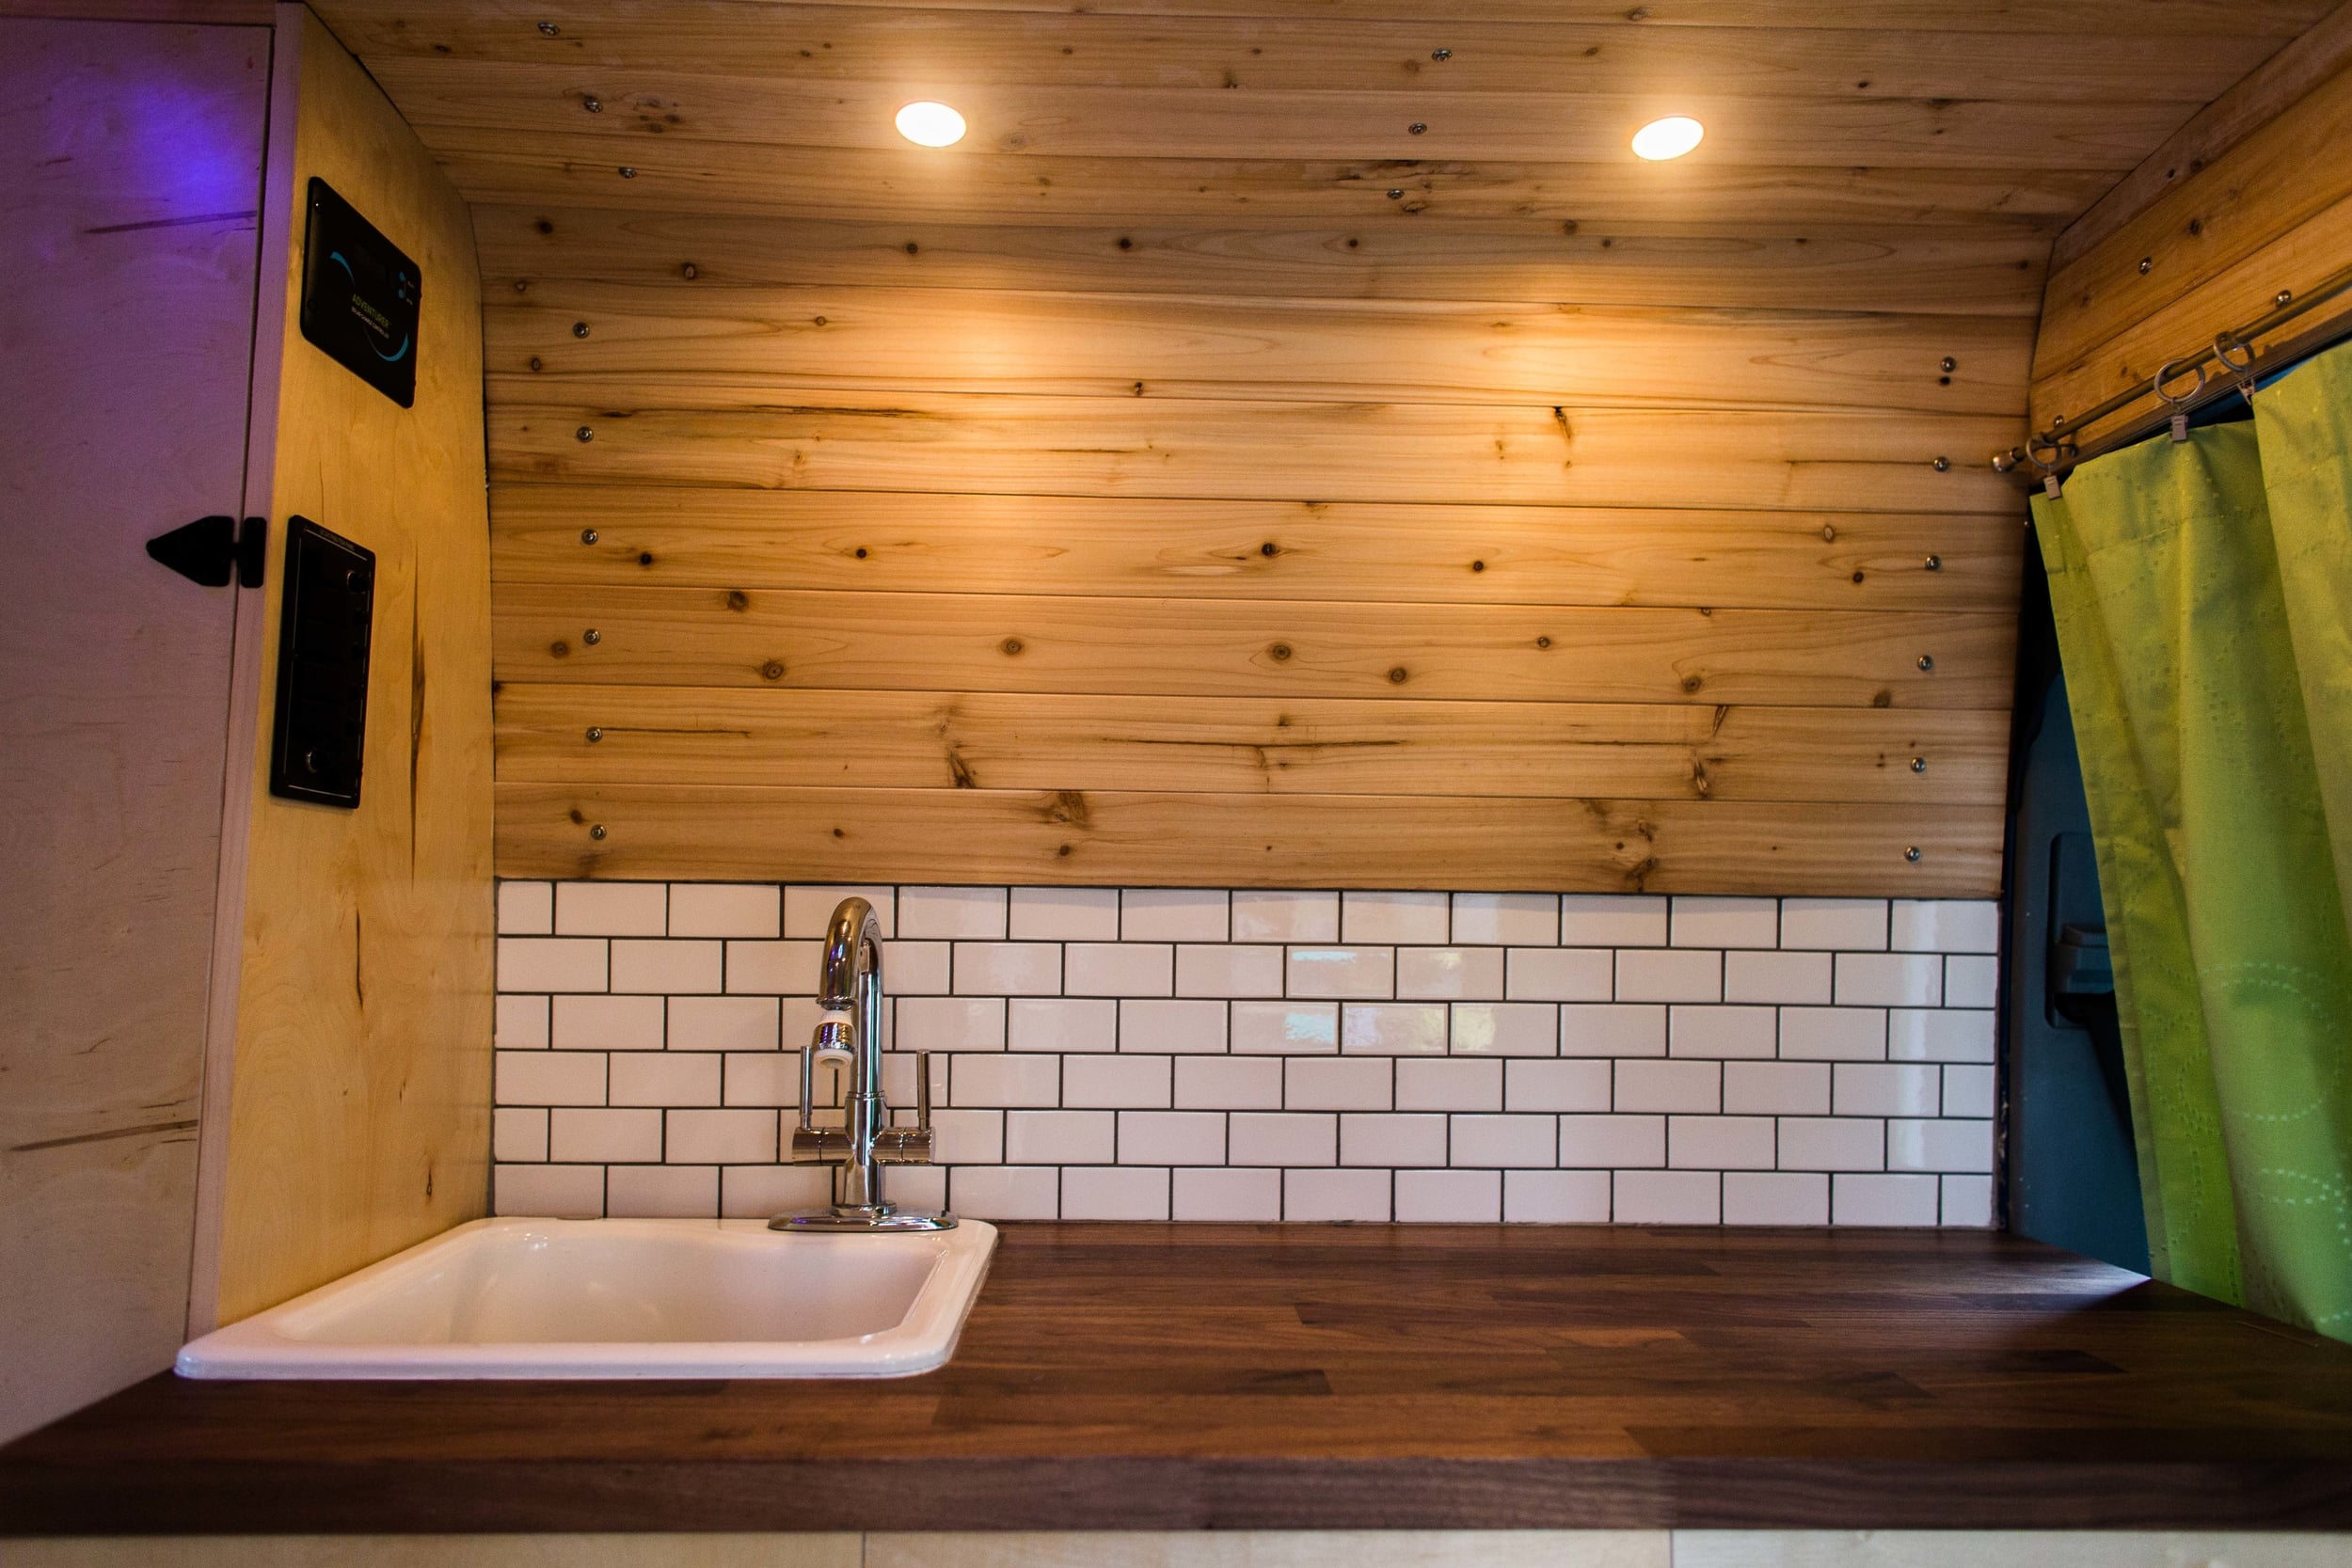
I found a pretty nice sink at the Rebuilding Center off Mississippi Ave here in Portland. Very cool place. The sink I found was an 18" American Standard bar sink (the Silhouette line). This sink uses their Americast technology, which is a porcelain enamel over steel. It gives the look of a cast iron sink (white vs stainless steel), but is much lighter than traditional cast iron. It also happened to be the perfect size for the space I made for it, and is nice and deep.
For countertops, I wanted a darker finish that would provide a nice contrast to the light birch furniture and the cedar walls. Granite or any other stone was out - too heavy. I settled on finding walnut butcher block. As it turns out, real walnut butcher block is expensive, especially because they come in 8 foot sections; I only needed 54 inches. I started looking at the Ikea options. They carry two versions: a solid wood in beech, birch, or oak and a particle board with real-wood veneer at the top. I considered getting a solid wood version and staining it a walnut color. However, the work needed to stain a countertop quickly turned me off of that. I settled on the particleboard/veneer as a good compromise.
Cutting out the hole for the sink was fairly straightforward. I found installation measurements online, traced it out, and drilled pilot holes with a drill. After measuring for the millionth time, I used a jig saw with a clean-cut blade to cut out the outline. Once the hole was cut, pocket screw were used to secure the top to the cabinets.
Next, I edgebanded the entire face of the cabinets and cut out doors (which were also edgebanded!). Of course, I did not learn my lesson from last time and forgot to add extra tolerance between doors. This left little wiggle room between door faces, and resulted in installing, adjusting, and readjusting cabinet doors so everything would close. It took a lot of patience, but worked out. Everything closes VERY tightly now, and sometimes requires some convincing to close. For latches, I read on various RV forums that these hidden brass ball/spring latches are the strongest. I ended up installing these on all drawers and doors in the kitchen, and later in the storage shelves.
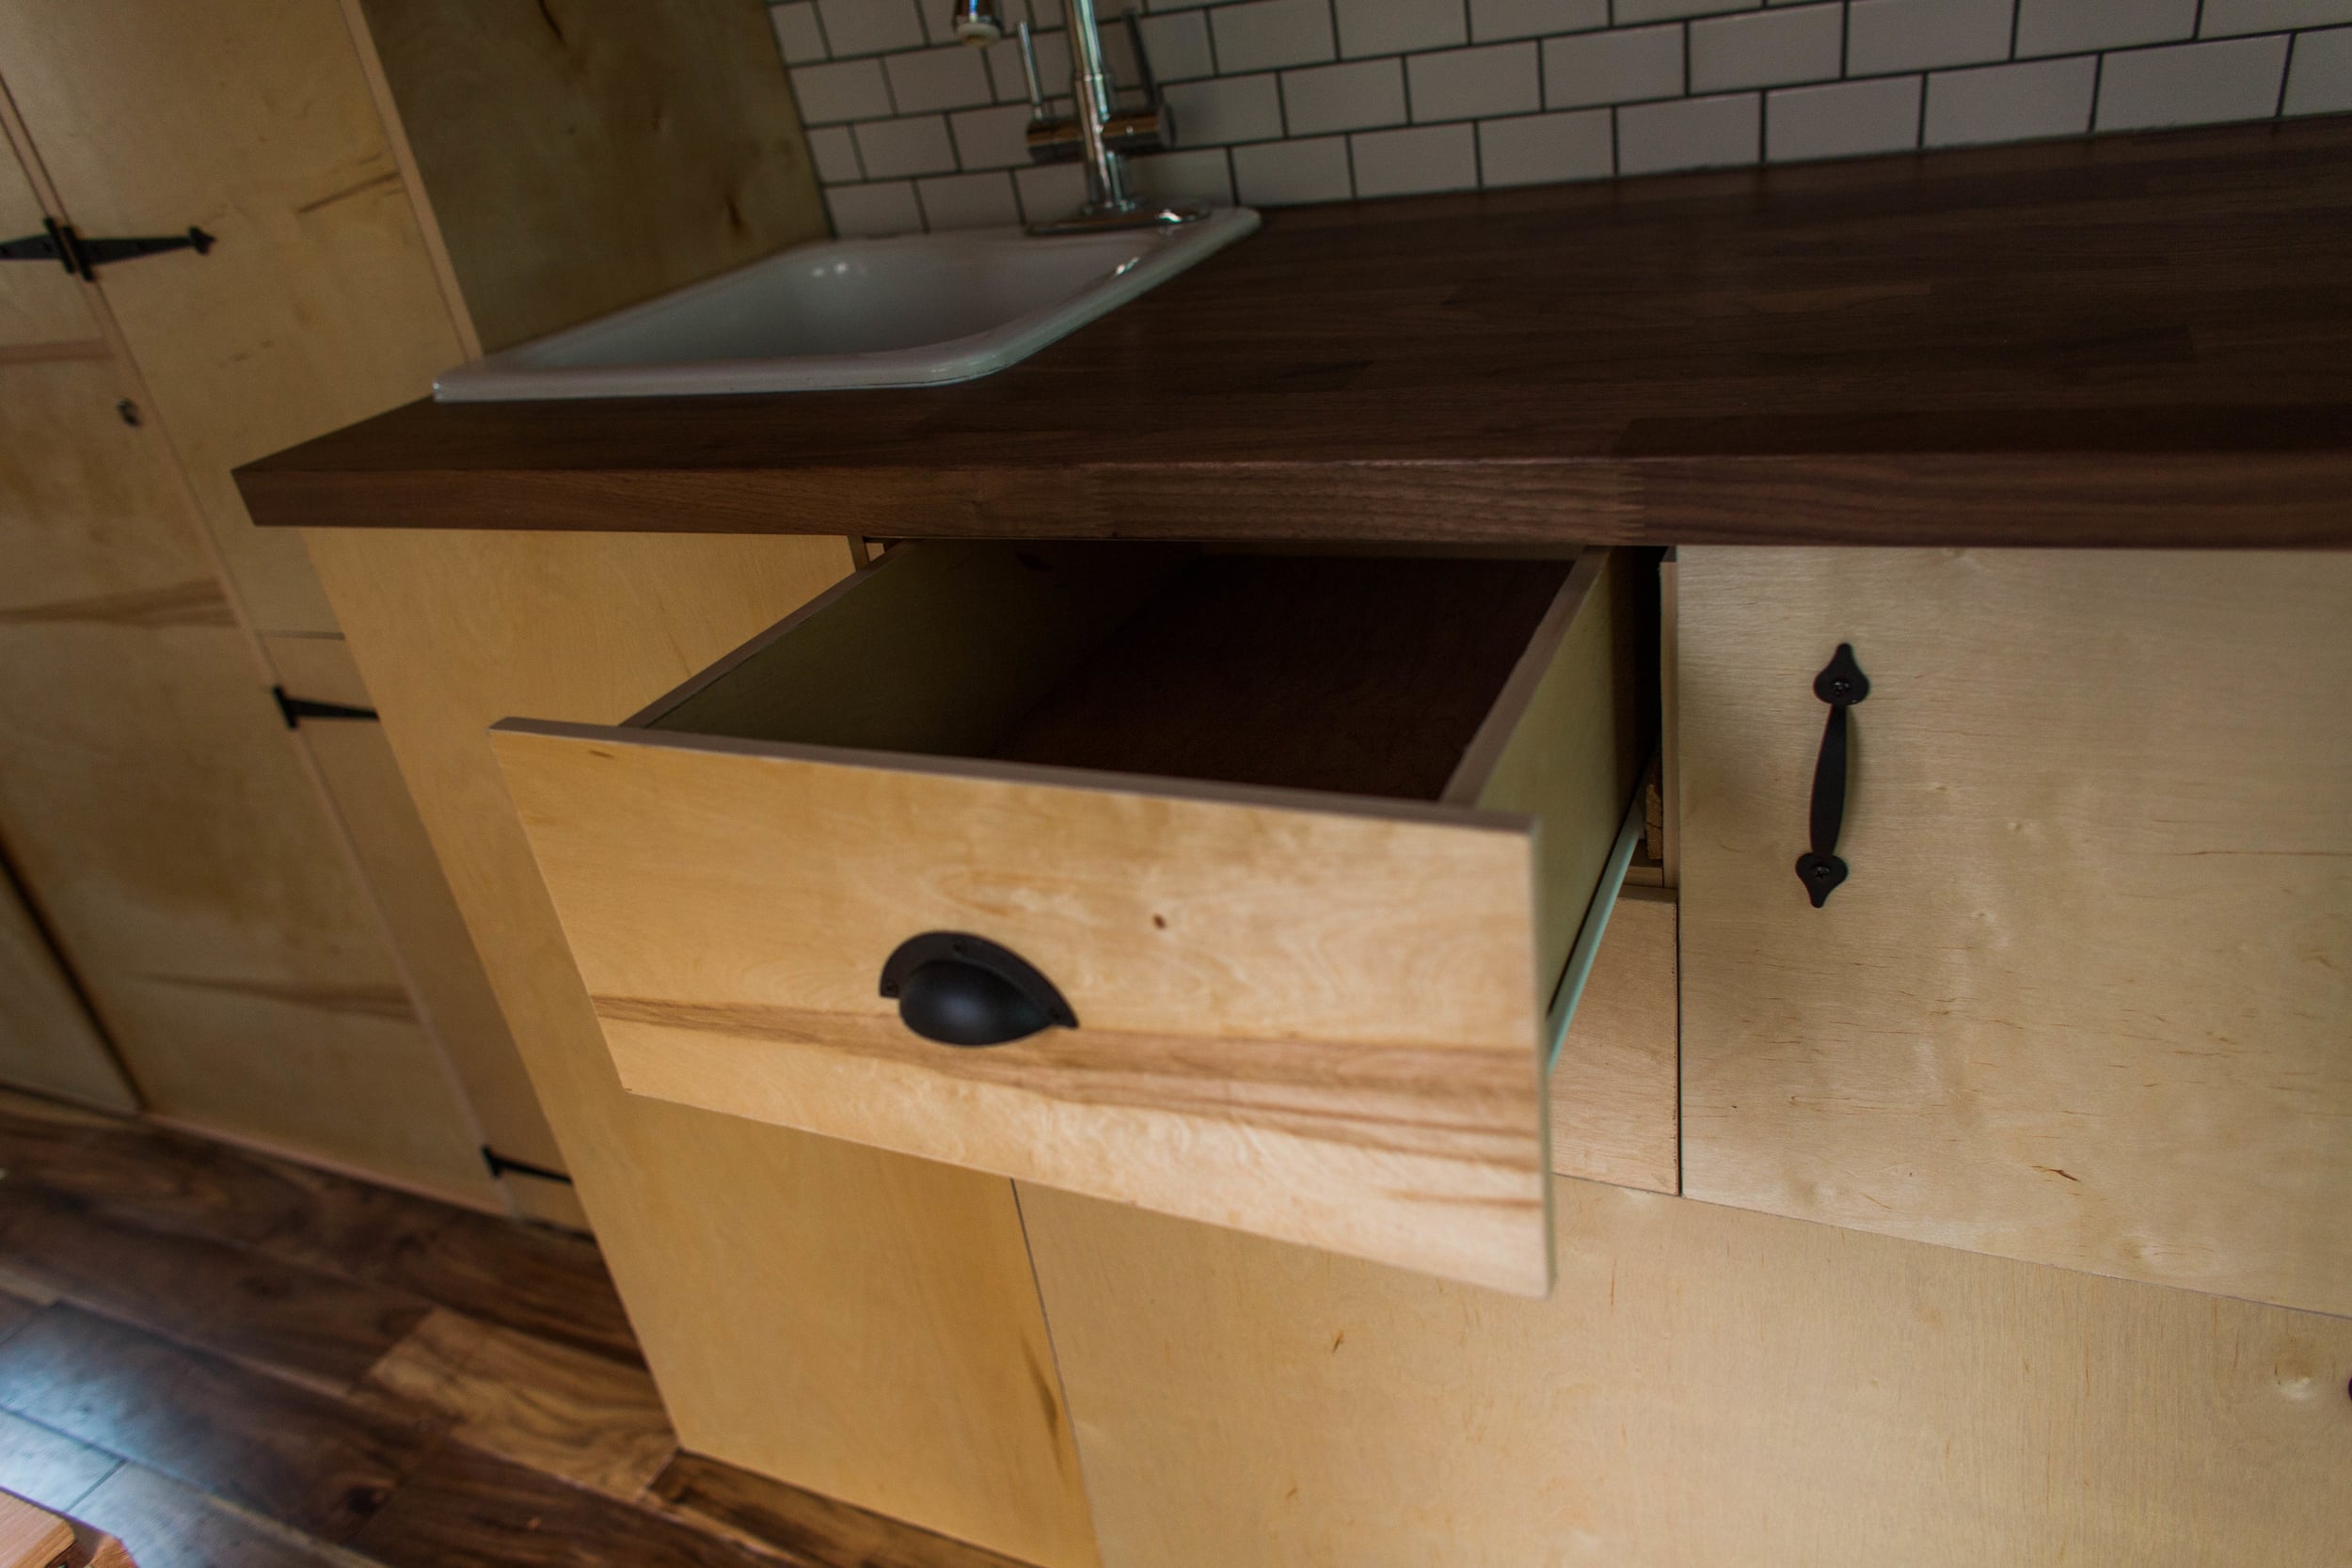
For the drawer, I used some scrap pieces to make the four drawer sides, which were pocket screwed together. I then tacked a square dowel on the bottom of the box to support the bottom. The bottom was made out of scrap 1/4" plywood that i used on the walls and was tacked onto the square dowel. Building the drawer was pretty easy, however I did not want to make two drawers out of laziness. I turned the bottom drawer into a flip-down cabinet, which worked out perfectly to store all our dishes.
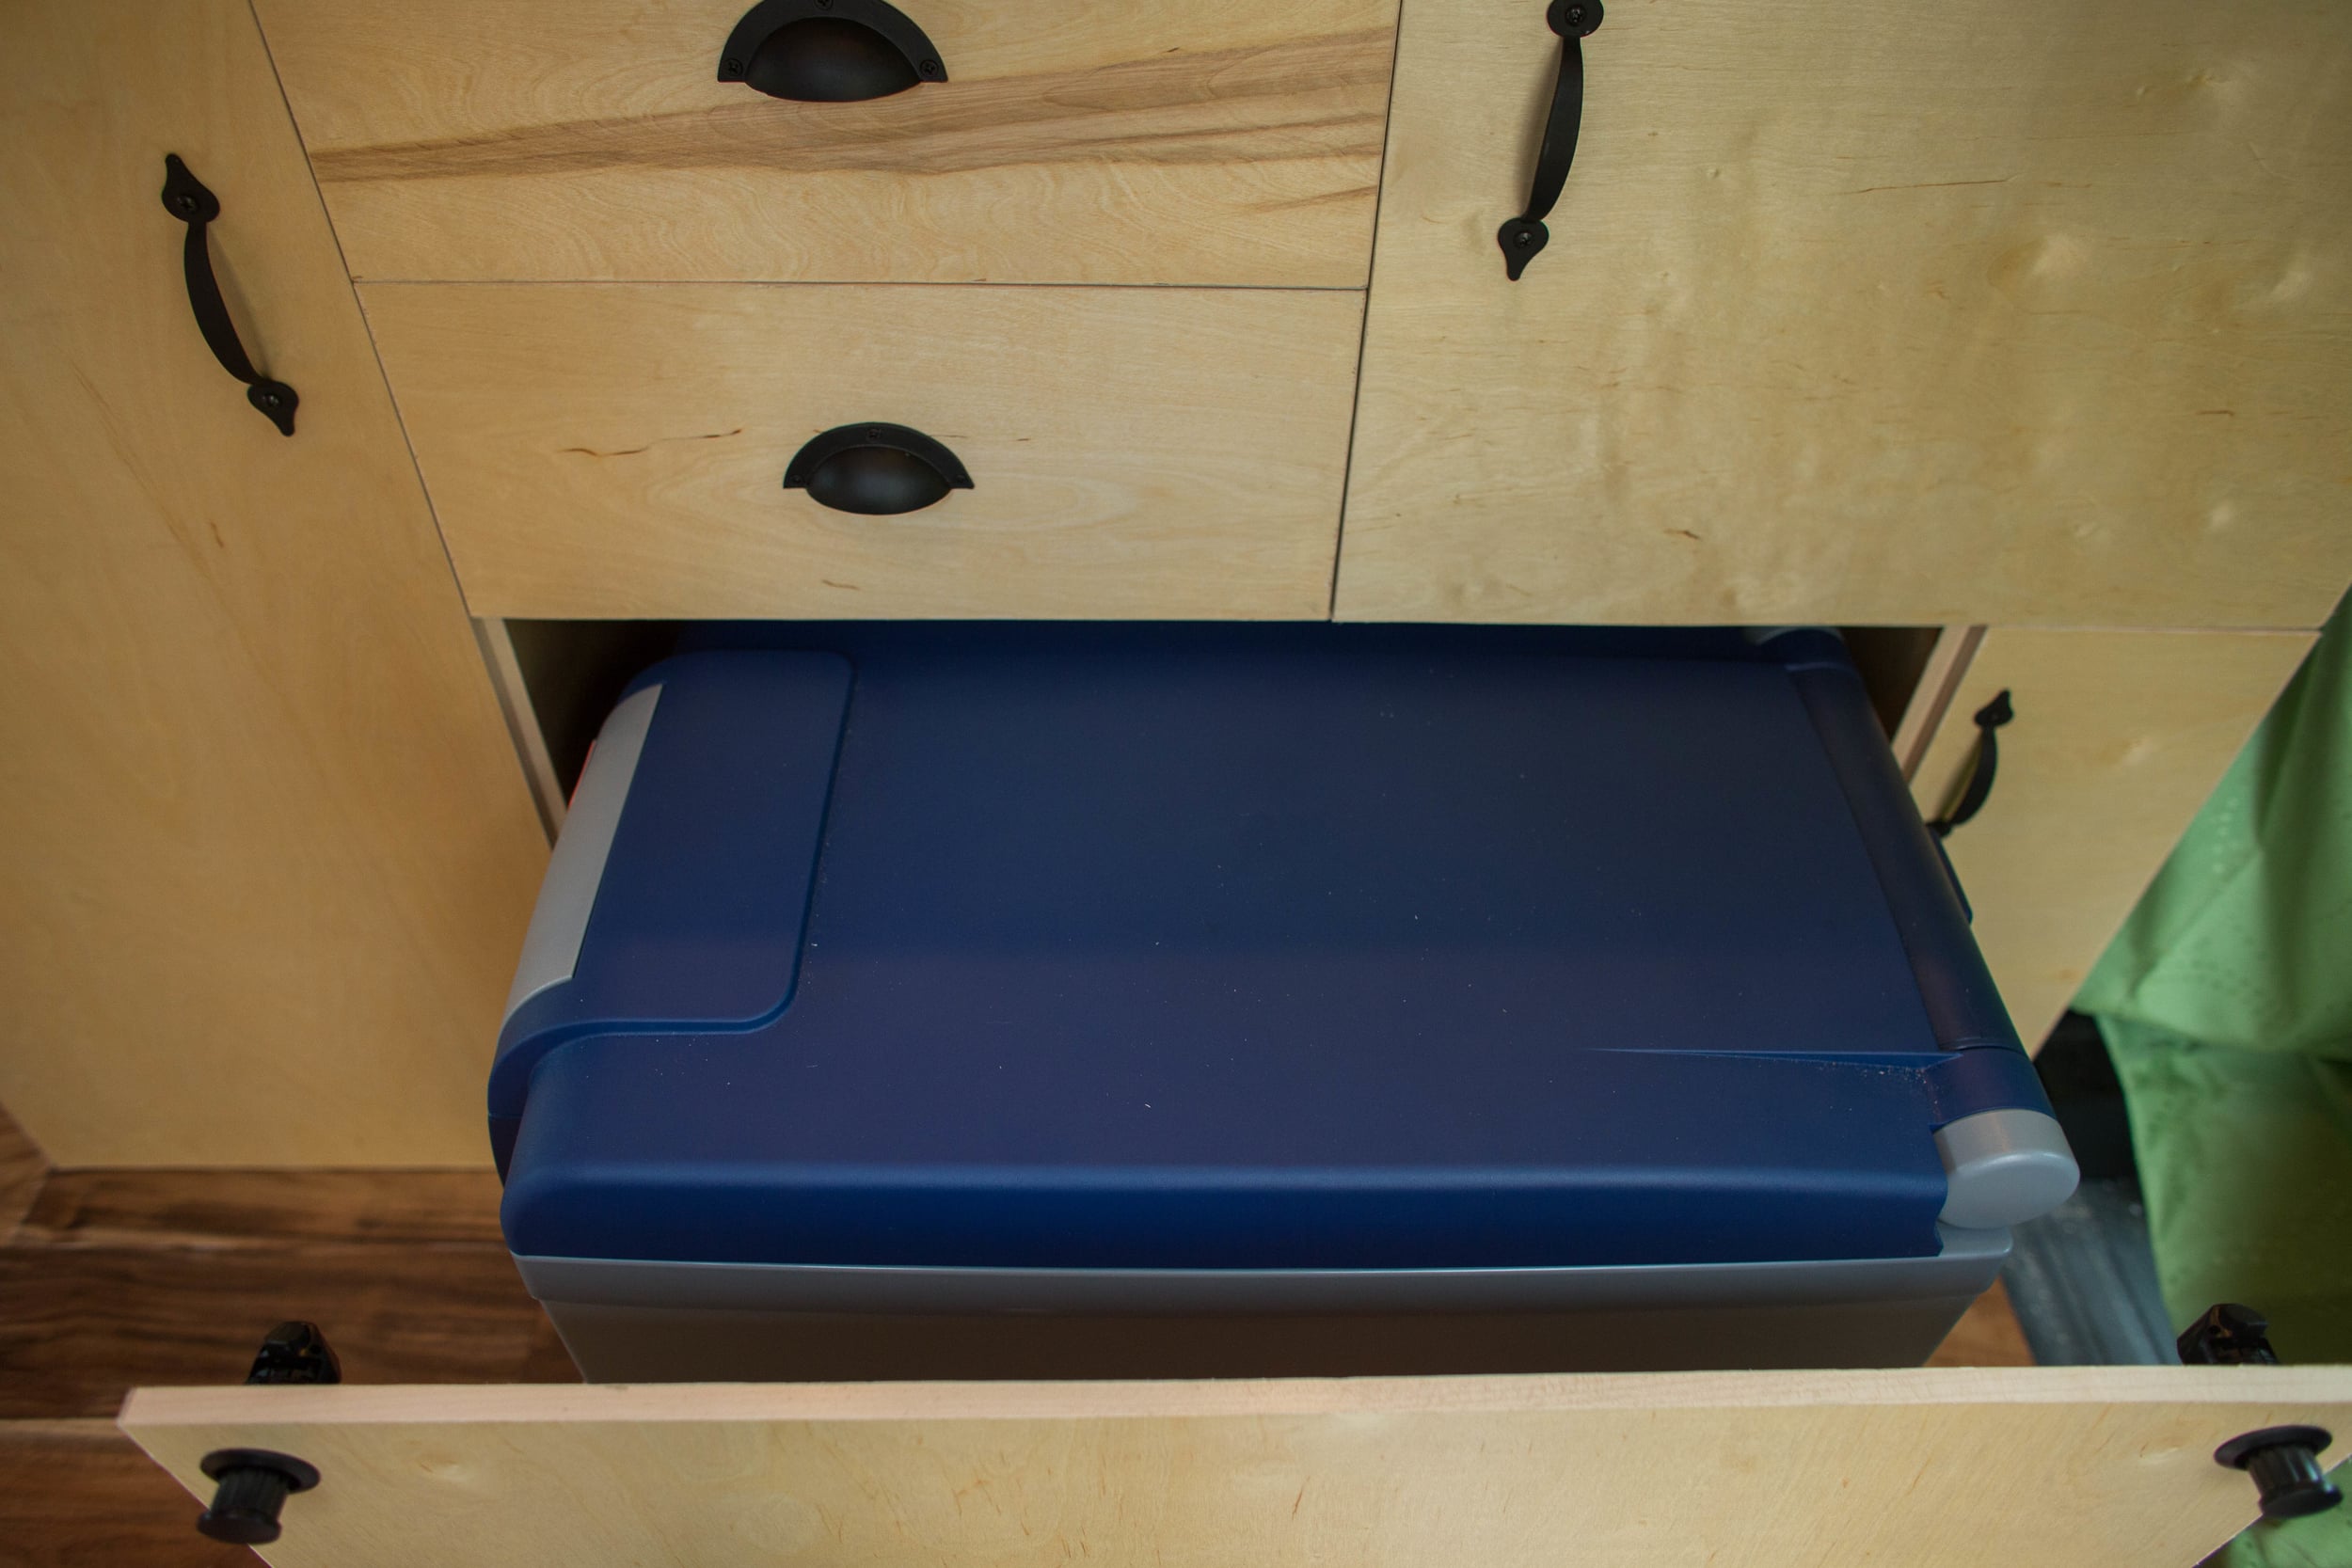
Since the ARB refrigerator itself is pretty heavy and will also hold heavy food, I found a heavy-duty bottom-mount drawer slide, used for slide out pantries. These are rated for like 130 lbs or something crazy. The slides screwed onto the floor and I used a piece of 3/4" plywood as the bottom. On the plywood, I bolted drilled out some large holes and re-used the d-rings and bolts (3/8") that we took out of the van. These will be used with cam load straps to secure the fridge to the drawer. To attach a large face to the drawer bottom, I used two shelving brackets (see lessons learned #3). To keep the drawer from pulling out when driving, I used this handy push-to-close/twist-to-open latches. They push in flush when not in use and hold the fridge drawer shut.
The last step in the kitchen was to tile the backsplash. I decided to go with white subway tile because I liked the simple, clean look. Much consideration went into what grout and adhesive to use. When dry, grout and tile form a rigid bond. I was afraid the rigors of the road and the flexing of the van sides would cause the tiles to crack and fall off. I considered using a flexible grout additive or silicone RV grout, but both were expensive and would take a while to arrive. After much analysis paralysis, I decided to just go with whatever cheap stuff I could find at Home Depot and hoped for the best. McKinley and I both had some vague childhood experience laying tile with our parents, which inevitably came in handy. Cutting, adhering and grouting tiles all went pretty smoothly. After taking the van out on the bumpy, washboard roads around Bishop, the tile survived! We have had no issues with them so far.

Lessons Learned:
When cutting the sink hole, screw a scrap piece of wood onto the sink hole wood and make sure it extends onto the counter top. That way, when you get to the end of your cut, the scrap wood catches the middle portion. Otherwise, the weight of the potion you are cutting out will fall through and splinter the wood.
Make your pocket holes in the sides of the cabinets in anticipation of securing the countertop. After I put in shelves near the drawers and because the cabinets were build against the shelf, i wasn't able to make pocket holes in certain areas of the cabinet. Ideally, the countertop should be secured all around.
Shelving brackets do not form a 90 degree angle. It's something a little more. This caused a lot of headaches trying to get the draw front to close flush with the cabinet.
Measure cabinet doors accurately and add the right tolerances!